

Introduction
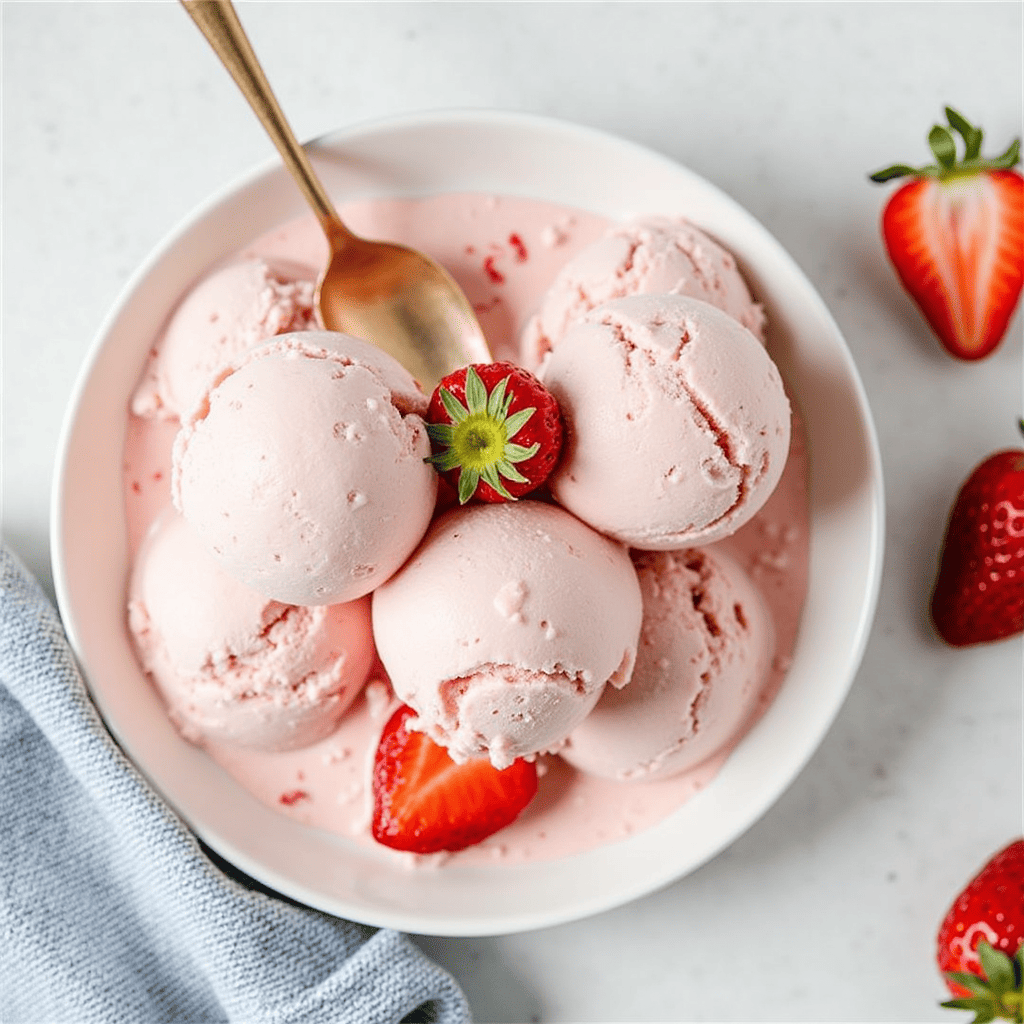
There’s something undeniably magical about the combination of sweet, juicy strawberries and the rich, aromatic flavor of vanilla beans. Strawberry Vanilla Bean Ice Cream is the ultimate dessert that brings together the best of both worlds—creamy, indulgent vanilla ice cream swirled with the fresh, vibrant taste of strawberries. Whether you’re enjoying it on a hot summer day or as a comforting treat year-round, this classic flavor duo never fails to delight. Making it at home allows you to savor the freshest ingredients and customize it to your liking, creating a dessert that’s truly unforgettable.
Homemade ice cream has a charm that store-bought versions simply can’t match. When you craft your own Strawberry Vanilla Bean Ice Cream, you have full control over the quality of ingredients, ensuring a rich, creamy texture and a burst of natural flavors. Plus, the process is surprisingly simple and rewarding. Whether you’re an experienced home cook or a beginner in the kitchen, this recipe is a fun and delicious way to impress your family and friends. So, grab your ingredients and let’s dive into the steps to create the creamiest, most irresistible Strawberry Vanilla Bean Ice Cream you’ve ever tasted!
Ingredients for the Perfect Strawberry Vanilla Bean Ice Cream
Essential Ingredients
To create the creamiest and most flavorful Strawberry Vanilla Bean Ice Cream, you’ll need a handful of simple, high-quality ingredients. Here’s what you’ll need:
- Fresh Strawberries: 2 cups (about 300g), hulled and sliced. Fresh strawberries provide a natural sweetness and vibrant flavor that’s hard to beat.
- Vanilla Beans: 1-2 whole vanilla beans (or 1 tablespoon of pure vanilla extract as a substitute). The tiny seeds inside the vanilla bean pods add a rich, aromatic depth to the ice cream.
- Heavy Cream: 2 cups (480ml). This is the key to achieving that luxurious, creamy texture.
- Whole Milk: 1 cup (240ml). Whole milk balances the richness of the heavy cream while keeping the ice cream smooth.
- Granulated Sugar: ¾ cup (150g). Sugar not only sweetens the ice cream but also helps prevent ice crystals from forming.
- Egg Yolks: 4 large egg yolks. These act as a natural emulsifier, giving the ice cream a velvety consistency.
- Pinch of Salt: Just a small pinch to enhance all the flavors.
These ingredients work together to create a perfectly balanced ice cream that’s rich, creamy, and bursting with the natural flavors of strawberries and vanilla.
Tips for Choosing the Best Ingredients
The quality of your ingredients can make or break your Strawberry Vanilla Bean Ice Cream. Here’s how to choose the best:
- Use Ripe Strawberries: Look for strawberries that are bright red, fragrant, and slightly soft to the touch. Ripe strawberries are naturally sweeter and more flavorful, reducing the need for extra sugar.
- Opt for High-Quality Vanilla Beans: If using vanilla beans, choose plump, moist pods that are easy to split open. If you’re using vanilla extract, make sure it’s pure vanilla extract, not imitation, for the best flavor.
- Choose Full-Fat Dairy: Heavy cream and whole milk are essential for achieving that rich, creamy texture. Avoid low-fat alternatives, as they can result in a less satisfying consistency.
- Fresh Egg Yolks: Use fresh, high-quality eggs for the best results. The yolks add richness and help create a smooth, custard-like base.
By selecting the best ingredients, you’ll ensure your ice cream is not only delicious but also has a professional-quality finish.
Optional Add-Ins
While the classic Strawberry Vanilla Bean Ice Cream is delightful on its own, you can elevate it with a few fun add-ins. Here are some ideas:
- Chocolate Chips: Add a handful of mini chocolate chips for a sweet, crunchy contrast.
- Crushed Cookies: Mix in crushed shortbread or graham crackers for a playful texture.
- Strawberry Jam Swirl: Swirl in a few tablespoons of homemade or store-bought strawberry jam for an extra burst of berry flavor.
- Toasted Nuts: Sprinkle in some chopped toasted almonds or pistachios for a nutty crunch.
- Fresh Fruit: Fold in additional diced strawberries or other berries like raspberries or blueberries for a fruity twist.
These add-ins allow you to customize your ice cream and make it uniquely yours. Feel free to get creative and experiment with your favorite flavors!
Step-by-Step Instructions for Making Strawberry Vanilla Bean Ice Cream
Preparing the Strawberry Base
The strawberry base is the heart of your ice cream, providing that fresh, fruity flavor. Here’s how to prepare it:
- Wash and Hull the Strawberries: Rinse 2 cups of fresh strawberries under cold water to remove any dirt. Pat them dry with a paper towel, then remove the green stems (hulling) using a paring knife or a strawberry huller.
- Puree the Strawberries: Slice the strawberries and place them in a blender or food processor. Blend until smooth. For a chunkier texture, pulse a few times instead of blending completely.
- Cook the Strawberry Mixture: Transfer the puree to a small saucepan and add 2-3 tablespoons of sugar (adjust to taste). Cook over medium heat for 5-7 minutes, stirring occasionally, until the mixture thickens slightly. This step intensifies the strawberry flavor and removes excess moisture, which can lead to ice crystals. Let the mixture cool completely before using.
Tips for Enhancing Flavor:
- Add a splash of lemon juice to brighten the strawberry flavor.
- For a deeper flavor, let the cooked strawberry mixture sit in the fridge for a few hours or overnight.
Infusing the Vanilla Bean
Vanilla beans are the star of this ice cream, adding a rich, aromatic depth. Here’s how to use them:
- Split the Vanilla Bean: Using a sharp knife, slice the vanilla bean pod lengthwise to expose the tiny seeds inside.
- Scrape the Seeds: Use the back of the knife to scrape out the seeds. These seeds are what give the ice cream its signature vanilla flavor.
- Infuse the Cream: Add the scraped seeds and the empty pod to the cream and milk mixture while heating. This allows the vanilla flavor to fully infuse into the base.
Pro Tip: If you don’t have vanilla beans, you can substitute 1 tablespoon of pure vanilla extract. Add it after the base has cooled to preserve its flavor.
Creating the Ice Cream Base
The ice cream base is what gives your dessert its creamy, luxurious texture. Follow these steps:
- Heat the Dairy: In a medium saucepan, combine 2 cups of heavy cream and 1 cup of whole milk. Add the scraped vanilla bean seeds and the pod. Heat the mixture over medium heat until it’s warm but not boiling (about 5 minutes).
- Whisk the Egg Yolks and Sugar: In a separate bowl, whisk together 4 egg yolks and ¾ cup of sugar until the mixture is pale and slightly thickened.
- Temper the Eggs: Slowly pour a small amount of the warm cream mixture into the egg yolks, whisking constantly. This prevents the eggs from curdling. Gradually add the rest of the cream mixture while whisking.
- Cook the Custard: Return the mixture to the saucepan and cook over low heat, stirring constantly, until it thickens enough to coat the back of a spoon (about 5-7 minutes). Do not let it boil.
- Chill the Mixture: Strain the custard through a fine-mesh sieve to remove the vanilla bean pod and any cooked egg bits. Let the mixture cool to room temperature, then cover and refrigerate for at least 4 hours or overnight. Chilling ensures a smoother texture and better churning results.
Churning and Freezing
The final step is churning and freezing your ice cream to achieve the perfect creamy texture:
- Using an Ice Cream Maker:
- Pour the chilled ice cream base into your ice cream maker.
- Churn according to the manufacturer’s instructions, usually about 20-25 minutes, until the mixture reaches a soft-serve consistency.
- During the last 5 minutes of churning, add the cooled strawberry puree and any optional add-ins (like chocolate chips or crushed cookies).
- Transfer the churned ice cream to an airtight container and freeze for at least 2-3 hours to firm up.
- No-Churn Method:
- If you don’t have an ice cream maker, you can still make delicious ice cream. Whip 2 cups of heavy cream until stiff peaks form.
- Fold the whipped cream into the chilled ice cream base and strawberry puree until fully combined.
- Pour the mixture into a loaf pan or airtight container, cover with plastic wrap (pressing it directly onto the surface to prevent ice crystals), and freeze for 4-6 hours or until firm.
Tips for the Creamiest Texture:
- Avoid over-churning, as it can make the ice cream grainy.
- For the no-churn method, let the ice cream sit at room temperature for 5-10 minutes before scooping for easier serving.
Tips for the Creamiest Strawberry Vanilla Bean Ice Cream
The Role of Fat Content
The fat content in your ice cream base plays a crucial role in achieving that rich, creamy texture. Here’s how heavy cream and whole milk contribute:
- Heavy Cream: With a fat content of around 36-40%, heavy cream is the star ingredient that gives ice cream its luxurious mouthfeel. The fat molecules coat your tongue, creating a smooth, velvety texture that’s hard to replicate with lower-fat alternatives.
- Whole Milk: Whole milk, which contains about 3.5% fat, complements the heavy cream by adding lightness and balance. It also provides the necessary liquid to create the right consistency without making the ice cream too dense.
Why Fat Matters:
- Fat prevents the formation of large ice crystals, which can make ice cream grainy.
- It helps stabilize the ice cream base, ensuring a smooth churn and a creamy final product.
For the best results, stick to full-fat dairy. Low-fat or skim milk can result in a less satisfying, icy texture.
Avoiding Ice Crystals
Ice crystals are the enemy of creamy ice cream. Here are some tips to keep your Strawberry Vanilla Bean Ice Cream smooth and crystal-free:
- Chill Your Base Thoroughly: Always refrigerate your ice cream base for at least 4 hours or overnight before churning. A cold base freezes faster, reducing the chance of large ice crystals forming.
- Cover with Plastic Wrap: When storing your ice cream in the freezer, press a piece of plastic wrap directly onto the surface of the ice cream before sealing the container. This creates a barrier that prevents air from reaching the ice cream, which can cause freezer burn and ice crystals.
- Store in the Back of the Freezer: The temperature at the back of the freezer is more consistent than near the door, where it fluctuates every time you open it. Consistent temperature helps maintain a smooth texture.
- Avoid Over-Churning: Over-churning can incorporate too much air into the ice cream, leading to a grainy texture. Follow your ice cream maker’s instructions and stop churning once the mixture reaches a soft-serve consistency.
Pro Tip: If you notice small ice crystals forming after a few days, let the ice cream sit at room temperature for 5-10 minutes before scooping. This softens the texture and makes it easier to serve.
Serving Suggestions
Once you’ve mastered the art of making Strawberry Vanilla Bean Ice Cream, it’s time to serve it in style! Here are some delicious ways to enjoy your homemade treat:
- Fresh Strawberries: Top your ice cream with freshly sliced strawberries for an extra burst of fruity flavor.
- Waffle Cones or Bowls: Serve your ice cream in homemade or store-bought waffle cones or bowls for a classic touch.
- Chocolate Sauce: Drizzle warm chocolate sauce over the ice cream for a decadent twist.
- Whipped Cream: Add a dollop of freshly whipped cream and a sprinkle of vanilla bean seeds for an elegant presentation.
- Crushed Nuts: Sprinkle toasted almonds, pistachios, or pecans on top for a satisfying crunch.
- Berry Compote: Pair your ice cream with a homemade berry compote made from strawberries, raspberries, or blueberries.
- Ice Cream Sandwiches: Sandwich a scoop of ice cream between two cookies (like shortbread or chocolate chip) for a fun, handheld dessert.
Presentation Tips:
- Use a warm ice cream scoop to create perfect, round scoops.
- Garnish with a fresh mint leaf or edible flowers for a pop of color.
Frequently Asked Questions (FAQs) About Strawberry Vanilla Bean Ice Cream
Can I Use Frozen Strawberries?
Yes, you can use frozen strawberries if fresh ones aren’t available, but fresh strawberries are preferred for the best flavor and texture. Here’s how to use frozen strawberries:
- Thaw and Drain: Thaw the frozen strawberries completely and drain any excess liquid. This prevents the ice cream from becoming too watery.
- Adjust Sugar: Frozen strawberries can sometimes be less sweet than fresh ones, so you may need to add a bit more sugar to the puree.
- Blend Smoothly: Puree the thawed strawberries until smooth, then cook the mixture as directed to concentrate the flavor.
While frozen strawberries are a convenient alternative, fresh strawberries will give your ice cream a brighter, more vibrant taste.
How Long Does Homemade Ice Cream Last?
Homemade Strawberry Vanilla Bean Ice Cream typically lasts 1-2 weeks in the freezer if stored properly. To maximize its shelf life:
- Use an Airtight Container: Store the ice cream in a freezer-safe, airtight container to prevent freezer burn and odors from affecting the flavor.
- Press Plastic Wrap: Place a piece of plastic wrap directly on the surface of the ice cream before sealing the container. This helps prevent ice crystals from forming.
- Keep It Cold: Ensure your freezer is set to 0°F (-18°C) or lower for optimal storage conditions.
While homemade ice cream is best enjoyed within the first week, it can still be delicious for up to two weeks if stored correctly.
Can I Make This Recipe Dairy-Free?
Absolutely! You can easily adapt this recipe to be dairy-free while still maintaining a creamy texture. Here’s how:
- Replace Heavy Cream and Milk: Use full-fat coconut milk or almond milk as a substitute for the heavy cream and whole milk. Coconut milk works particularly well because of its rich, creamy consistency.
- Use a Dairy-Free Sweetener: Stick with granulated sugar or use a dairy-free alternative like maple syrup or agave nectar.
- Egg-Free Option: If you’re avoiding eggs, you can skip the custard base and use a no-churn method with whipped coconut cream and sweetened condensed coconut milk.
Pro Tip: For the best results, chill your dairy-free milk and coconut cream overnight before using to ensure they whip and churn properly.
What If I Don’t Have an Ice Cream Maker?
No ice cream maker? No problem! You can still make delicious Strawberry Vanilla Bean Ice Cream using a no-churn method. Here’s how:
- Whip the Cream: In a large bowl, whip 2 cups of heavy cream (or coconut cream for a dairy-free version) until stiff peaks form.
- Sweeten the Base: In a separate bowl, mix 1 can (14 oz) of sweetened condensed milk with the strawberry puree and vanilla extract.
- Combine and Freeze: Gently fold the whipped cream into the strawberry mixture until fully combined. Pour the mixture into a loaf pan or airtight container, cover with plastic wrap, and freeze for 4-6 hours or until firm.
Tips for Success:
- Make sure your whipped cream is stiff before folding it into the base.
- For a smoother texture, let the ice cream sit at room temperature for 5-10 minutes before scooping.
This no-churn method is simple, requires no special equipment, and yields a creamy, dreamy ice cream that’s just as delicious as the churned version.
Conclusion
Recap the Process
Making Strawberry Vanilla Bean Ice Cream at home is easier than you might think, and the results are absolutely worth the effort. Let’s quickly recap the steps:
- Prepare the Strawberry Base: Wash, hull, and puree fresh strawberries, then cook the mixture to intensify the flavor.
- Infuse the Vanilla Bean: Scrape the seeds from a vanilla bean and infuse them into the cream and milk mixture for a rich, aromatic base.
- Create the Ice Cream Base: Combine the cream, milk, sugar, and egg yolks to make a smooth custard, then chill it thoroughly.
- Churn and Freeze: Use an ice cream maker to churn the mixture to a soft-serve consistency, or opt for a no-churn method with whipped cream and condensed milk.
- Add the Strawberry Puree: Fold in the cooled strawberry puree during the last few minutes of churning for a beautiful swirl of flavor.
With just a few simple steps and some patience, you can create a dessert that’s not only delicious but also free from artificial additives and preservatives. Homemade ice cream is a rewarding experience that allows you to control the quality of ingredients and customize the flavors to your liking.
Encourage Readers to Try the Recipe
Now that you know how to make the creamiest Strawberry Vanilla Bean Ice Cream, it’s time to roll up your sleeves and give it a try! Whether you’re an experienced home cook or a beginner in the kitchen, this recipe is straightforward and fun to make. Plus, the satisfaction of scooping out a bowl of homemade ice cream is unmatched.
We’d love to hear about your experience! Did you add any creative twists, like chocolate chips or a swirl of jam? How did your family and friends enjoy it? Share your creations with us in the comments below or tag us on social media. Your feedback and ideas inspire us and help build a community of ice cream lovers who are passionate about homemade desserts.
If you have any questions or need tips along the way, don’t hesitate to reach out. We’re here to help you perfect your ice cream-making skills. And if you loved this recipe, be sure to explore our other dessert ideas for more sweet inspiration.
Call-to-Action
Ready to take your dessert game to the next level? Subscribe to our blog for more delicious recipes, tips, and tricks delivered straight to your inbox. From classic flavors to innovative creations, we’ve got everything you need to satisfy your sweet tooth.
Don’t forget to pin this recipe on Pinterest or share it with your friends and family. After all, the joy of homemade ice cream is best when shared. Happy churning, and enjoy every creamy, dreamy bite of your Strawberry Vanilla Bean Ice Cream!