Introduction
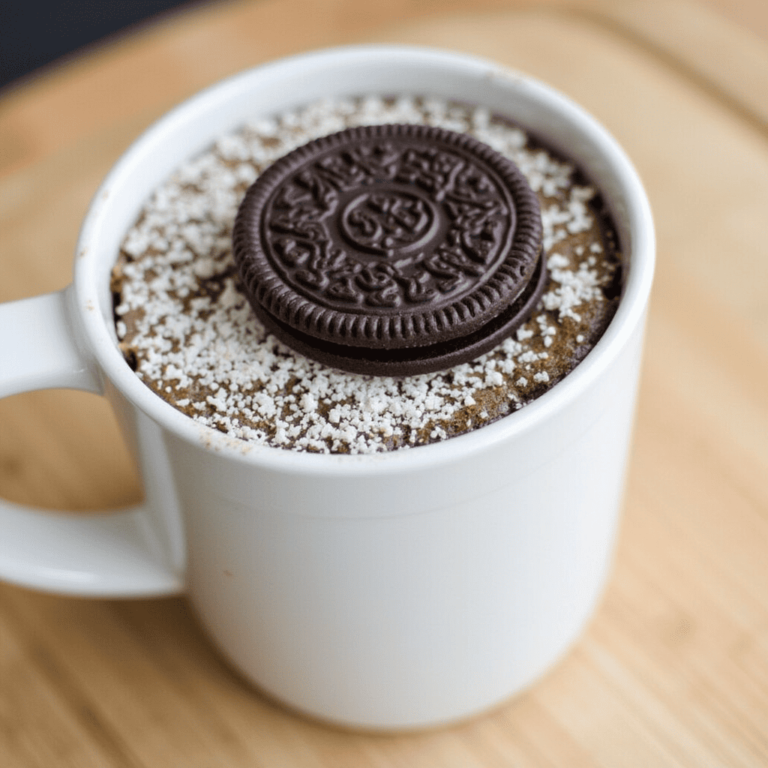
Craving a quick and delicious dessert but don’t want to spend hours in the kitchen? Look no further than this Oreo Mug Cake—a single-serve treat that’s ready in just minutes! Perfect for satisfying your sweet tooth, this easy recipe combines the iconic crunch of Oreos with a soft, cake-like texture, all made effortlessly in your microwave. Whether you’re a busy parent, a student with late-night cravings, or simply someone who loves desserts, this Oreo Mug Cake is your go-to solution for a fuss-free indulgence.
What makes this recipe stand out is its simplicity and speed. With just a handful of pantry staples and a microwave, you can whip up a decadent dessert that feels like a celebration in every bite. Plus, it’s customizable—add your favorite toppings like whipped cream, chocolate syrup, or even extra Oreo crumbs for an extra touch of indulgence. So, if you’re ready to make the perfect Oreo Mug Cake, grab your mug, and let’s get started!

Ingredients You’ll Need
Essential Ingredients
To make the perfect Oreo Mug Cake, you’ll need just a few basic ingredients that you probably already have in your kitchen. Here’s what you’ll need:
- 4-5 Oreo cookies: The star of the recipe! These provide the iconic chocolatey crunch and flavor.
- 2 tablespoons all-purpose flour: This gives the cake its structure.
- 1 tablespoon granulated sugar: Adds just the right amount of sweetness.
- 2 tablespoons milk: Helps bind the ingredients and creates a moist texture.
- 1/4 teaspoon baking powder: Ensures your mug cake rises and becomes fluffy.
- 1 tablespoon unsalted butter or oil: Adds richness and moisture to the cake.
These simple ingredients come together to create a dessert that’s both indulgent and incredibly easy to make.
Optional Add-Ins for Extra Flavor
Want to take your Oreo Mug Cake to the next level? Try these optional add-ins to customize your dessert:
- Chocolate chips: For an extra dose of gooey chocolate goodness.
- Vanilla extract: A splash enhances the overall flavor.
- Whipped cream: Perfect for topping your mug cake once it’s done.
- Caramel or chocolate syrup: Drizzle on top for a decadent finish.
- Crushed nuts: Add a bit of crunch and texture.
These add-ins let you personalize your mug cake to suit your taste preferences, making it even more special.
Pro Tip: Ingredient Substitutions
If you have dietary restrictions or preferences, don’t worry—this recipe is versatile! Here are some easy substitutions:
- Gluten-free: Use gluten-free flour and gluten-free Oreos.
- Dairy-free: Swap regular milk for almond, oat, or soy milk, and use dairy-free butter or coconut oil.
- Sugar-free: Replace granulated sugar with a sugar substitute like stevia or erythritol.
With these substitutions, everyone can enjoy a delicious Oreo Mug Cake tailored to their needs.
Step-by-Step Instructions to Make Oreo Mug Cake
Step 1: Crush the Oreos
Start by crushing 4-5 Oreo cookies into small pieces. You can do this by placing them in a ziplock bag and using a rolling pin or the bottom of a glass to crush them. For a finer texture, you can also use a food processor. Leave some larger chunks for added crunch in your mug cake.
Step 2: Mix the Ingredients
- In a microwave-safe mug, combine the crushed Oreos, flour, sugar, and baking powder. Mix well to ensure there are no lumps.
- Add the milk and melted butter (or oil) to the dry ingredients. Stir until the mixture is smooth and well combined.
- If you’re using any optional add-ins like chocolate chips or vanilla extract, fold them into the batter at this stage.
Step 3: Microwave the Mug Cake
- Place the mug in the microwave and cook on high for 1-2 minutes. Cooking time may vary depending on your microwave’s wattage, so start with 1 minute and check for doneness.
- The cake is ready when it has risen and looks set on top. Be careful not to overcook, as it can become dry.
Pro Tip: Avoiding Common Mistakes
- Don’t overmix: Overmixing can make the cake dense. Stir until just combined.
- Use the right mug: Choose a microwave-safe mug that’s large enough to allow the cake to rise without overflowing.
- Check for doneness: Insert a toothpick into the center of the cake. If it comes out clean, it’s done. If not, microwave in 10-second intervals until fully cooked.

Tips for the Perfect Oreo Mug Cake
Choosing the Right Mug
The mug you use can make or break your Oreo Mug Cake. Here’s what to keep in mind:
- Size: Choose a mug that holds at least 12 ounces to prevent overflow as the cake rises.
- Material: Use a microwave-safe ceramic or glass mug. Avoid metal or mugs with metallic accents, as they can cause sparks in the microwave.
- Shape: A wide, shallow mug ensures even cooking, while a tall, narrow mug might leave the center undercooked.
Pro Tip: If you’re unsure about the mug’s microwave safety, check the bottom for a “microwave-safe” label.
Customizing Your Mug Cake
One of the best things about an Oreo Mug Cake is how easy it is to customize. Here are some fun ideas to make it your own:
- Toppings: Add a scoop of vanilla ice cream, a drizzle of caramel or chocolate syrup, or a dollop of whipped cream.
- Mix-Ins: Stir in chocolate chips, peanut butter, or even a handful of sprinkles for extra flavor and texture.
- Extra Oreos: Crush a few extra Oreos and sprinkle them on top for added crunch.
- Seasonal Twists: Add peppermint extract for a holiday version or top with fresh berries for a summer treat.
Let your creativity shine and make your mug cake uniquely yours!
Serving Suggestions
Want to make your Oreo Mug Cake look as good as it tastes? Follow these tips for an Instagram-worthy dessert:
- Garnish: Add a whole Oreo cookie or a mint leaf on top for a polished look.
- Layering: Serve the mug cake with layers of whipped cream and crushed Oreos for a parfait-style presentation.
- Lighting: Take photos in natural light to capture the rich colors and textures of your dessert.
- Props: Use colorful napkins, a stylish spoon, or a decorative plate to enhance your photo.
A beautifully presented mug cake not only tastes great but also makes for stunning social media content!
Frequently Asked Questions (FAQs)
Can I Make an Oreo Mug Cake Without a Microwave?
Absolutely! If you don’t have a microwave, you can still enjoy this delicious dessert:
- Oven Method: Preheat your oven to 350°F (175°C). Prepare the batter in an oven-safe ramekin or mug and bake for 10-12 minutes, or until a toothpick inserted comes out clean.
- Air Fryer Method: Cook the mug cake in an air fryer at 320°F (160°C) for 8-10 minutes. Keep an eye on it to avoid overcooking.
These methods might take a bit longer, but they deliver equally delicious results.
How Do I Store Leftover Mug Cake?
While Oreo Mug Cake is best enjoyed fresh, you can store leftovers if needed:
- Refrigeration: Cover the mug with plastic wrap or transfer the cake to an airtight container. Store in the fridge for up to 2 days.
- Reheating: Microwave the cake for 10-15 seconds to warm it up before serving. Add a splash of milk if it feels dry.
Note: The texture might be slightly denser after refrigeration, but it will still taste delicious!
Is This Recipe Kid-Friendly?
Yes, this Oreo Mug Cake recipe is perfect for kids! Here’s how they can help:
- Crushing Oreos: Let them crush the cookies in a ziplock bag using a rolling pin or their hands.
- Mixing Ingredients: Kids can stir the batter in the mug (with supervision to avoid spills).
- Adding Toppings: Let them get creative with toppings like sprinkles, whipped cream, or chocolate chips.
It’s a fun and safe way to introduce kids to baking, and they’ll love enjoying their creation afterward!

Conclusion
There you have it—the ultimate guide to making the perfect Oreo Mug Cake in just minutes! This quick and easy dessert is a game-changer for anyone with a sweet tooth or a busy schedule. With its rich, chocolatey flavor and soft, cake-like texture, it’s no wonder this recipe has become a favorite for dessert lovers everywhere. Whether you’re treating yourself after a long day or impressing guests with a customizable treat, this Oreo Mug Cake is sure to hit the spot.
If you loved this recipe, why not explore more quick and delicious desserts? Check out our post on How to Make the Perfect Banana-Nog Cake: A Festive Holiday Treat for more ideas. And don’t forget to share your Oreo Mug Cake creations with us on social media—we’d love to see how you customized yours! Got questions or tips of your own? Leave a comment below and join the conversation. Happy baking!
Print
How to Make the Perfect Oreo Mug Cake in a Microwave
- Total Time: 5 minutes
- Yield: 1 serving 1x
Description
Make a delicious Oreo Mug Cake in 5 minutes! Easy microwave recipe with customizable toppings. Perfect for quick dessert cravings!
Ingredients
-
4–5 Oreo cookies
-
2 tablespoons all-purpose flour
-
1 tablespoon granulated sugar
-
2 tablespoons milk
-
1/4 teaspoon baking powder
-
1 tablespoon unsalted butter or oil
Optional Toppings:
-
Whipped cream
-
Chocolate syrup
-
Crushed Oreos
-
Vanilla ice cream
Instructions
-
Crush the Oreos: Place 4-5 Oreo cookies in a ziplock bag and crush them into small pieces using a rolling pin or the bottom of a glass. Leave some chunks for texture.
-
Mix the Ingredients: In a microwave-safe mug, combine the crushed Oreos, flour, sugar, and baking powder. Stir well. Add the milk and melted butter (or oil), and mix until smooth.
-
Microwave: Place the mug in the microwave and cook on high for 1-2 minutes. Start with 1 minute and check for doneness. The cake is ready when it has risen and looks set on top.
-
Add Toppings: Once cooked, top with whipped cream, chocolate syrup, or extra crushed Oreos. Serve immediately.
Notes
-
Mug Size: Use a microwave-safe mug that holds at least 12 ounces to prevent overflow.
-
Customization: Add chocolate chips, peanut butter, or a splash of vanilla extract for extra flavor.
-
Storage: Best enjoyed fresh, but leftovers can be stored in the fridge for up to 2 days. Reheat for 10-15 seconds before serving.
- Prep Time: 3 minutes
- Cook Time: 2 minutes
- Category: Dessert
- Method: Microwave
- Cuisine: American
Nutrition
- Calories: 300 kcal
- Sugar: 25g
- Protein: 4g


